
How to import products from the KokoonDesign catalog into WordPress/WooCommerce

Introduction
This document does not go into detail regarding the configuration of WooCommerce. It only details the process of importing the CSV file and documents any specificities.
The version of WordPress used is 5.6.
CSV FILE LAYOUT
The KokoonDesign catalog file for WordPress consists of 65 fields. 51 fields are common to all CMSes. Three are specific to WordPress and required for a first import.
The common fields are as follows:
You will find detail under each field when necessary. All these fields are, for the most part, product attributes that are yours to use (or not). All these fields are, for the most part, product attributes that are yours to use (or not).
- Reference
- The reference should be used as a unique identifier and SKU.
- EAN
- KOKOON name
- Short description
- Product description
- Lenght in CM
- Width in CM
- Height in CM
- Material – structured info
- Secondary Material – structured info
- Main colour
- Secondary colour
- Product Wheight
- Seat padding
- Back padding
- Armrest height
- Back width
- Back height
- Seat width
- Seat depth
- Adjustable in height?
- Sitting height
- Base diameter
- Stackable
- Maximum sustainable wheight
- 360° Rotation?
- Outside use?
- Rocking back
- Headrest adjustable in height?
- Number of bulbs
- Watts per bulb
- dimmable?
- Bulb fitting type
- Hang cable max lenght in cm
- Hang cable adjustable in height?
- Material description
- Structure material
- Drawer material
- Up shelf material
- Down shelf material
- Lamp Shade material
- Base material
- Sphere material
- Ceiling mount material
- Feet material
- Tablet material
- Tablet lenght
- Tablet Width
- Tablet diameter
- To be assembled? 1=No 2=Yes
- EU Custom code
The fields for WordPress are as follows:
- Category
- Product categories are contained in this field. There is one per product.
- featured picture
- The featured picture is contained in this field. It may be useful for you to use the standard import tool from WordPress. If you use Wp All Import, you can use the “Pictures url” field, and the first picture in the list will be used as the featured picture.
- pictures url
- o In this field, you’ll find the list of pictures relating to the product separated by a “,”.
IMPORT PROCEDURE
PREFACE
There are several import tools for Woocommerce. We’ll discuss two of them.
The first one is the standard tool provided with WordPress/Woocommerce, and we’ll explain why we don’t use it.
The other is a Premium plugin: Wp All Import and its add-on for Woocommerce which are both highly recommended for light importing of CSV files into WordPress/Woocommerce.
You can get them from the publisher’s website below:
https ://www.wpallimport.com/ en choisissant le « Woocommerce import Package »
The default tool is accessible from the dashboard by clicking on “Tools” then on “Import”.
ALL ABOUT THE STANDARD TOOL
The standard tool only supports classic delimiters, such as “;” and “,”.
In the KokoonDesign CSV file, the “description” field uses these characters repeatedly, which forces us to use less common delimiters like “#” or “|” in order to avoid column shifts.
When we use these specific delimiters and specify them in the advanced settings, the default import tool misbehaves and displays errors or simply does not recognize this delimiter, despite the fact that we’ve specified them beforehand…
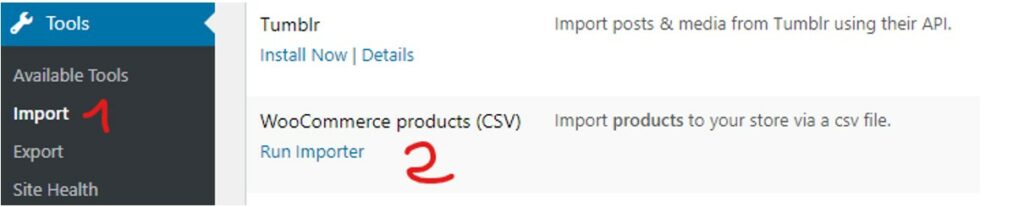
PROCEDURE WITH WP ALL IMPORT
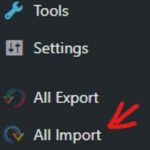
Wp All Import is accessible directly from the Dashboard menu by clicking on All Import.
Then click on the “Upload a File” button.
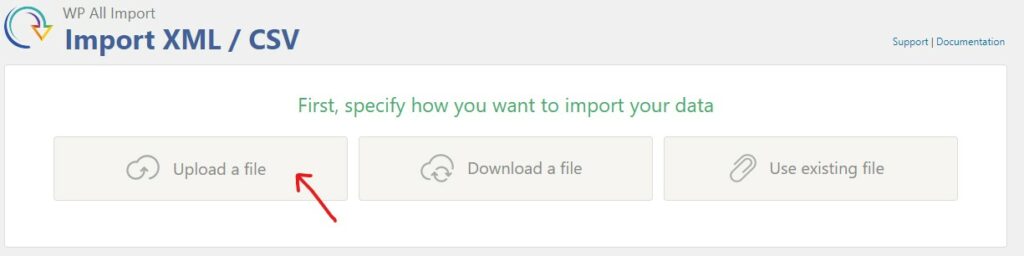
Next, click on your CSV file named “wordpress_final_csv_fr.csv”.
Finally, select Woocommerce Products as shown in the screenshot below:
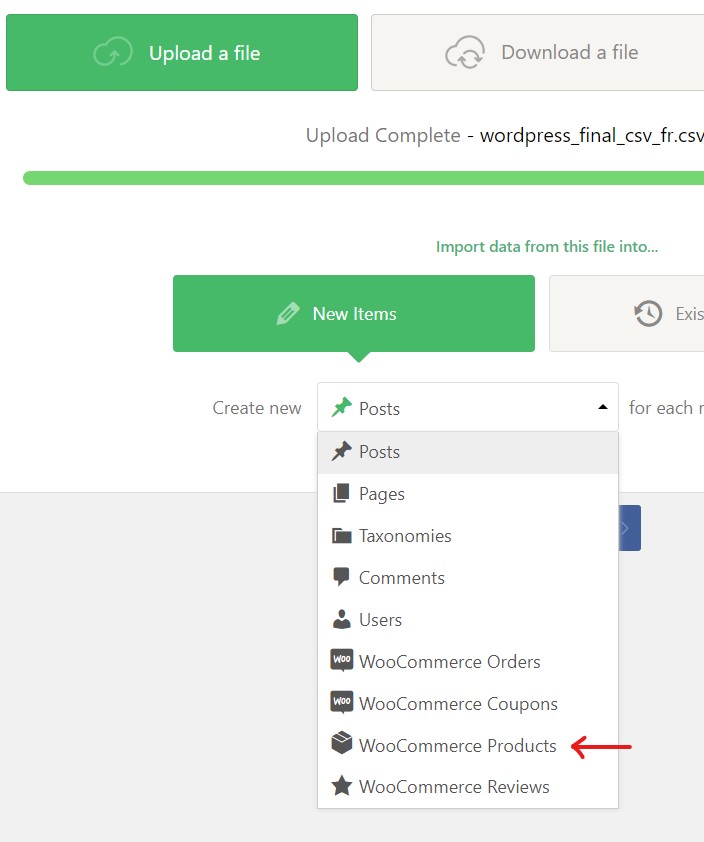
Then click on the “Continue to Step 2” button.
In the next window, specify the delimiter “ | ” in the small window.
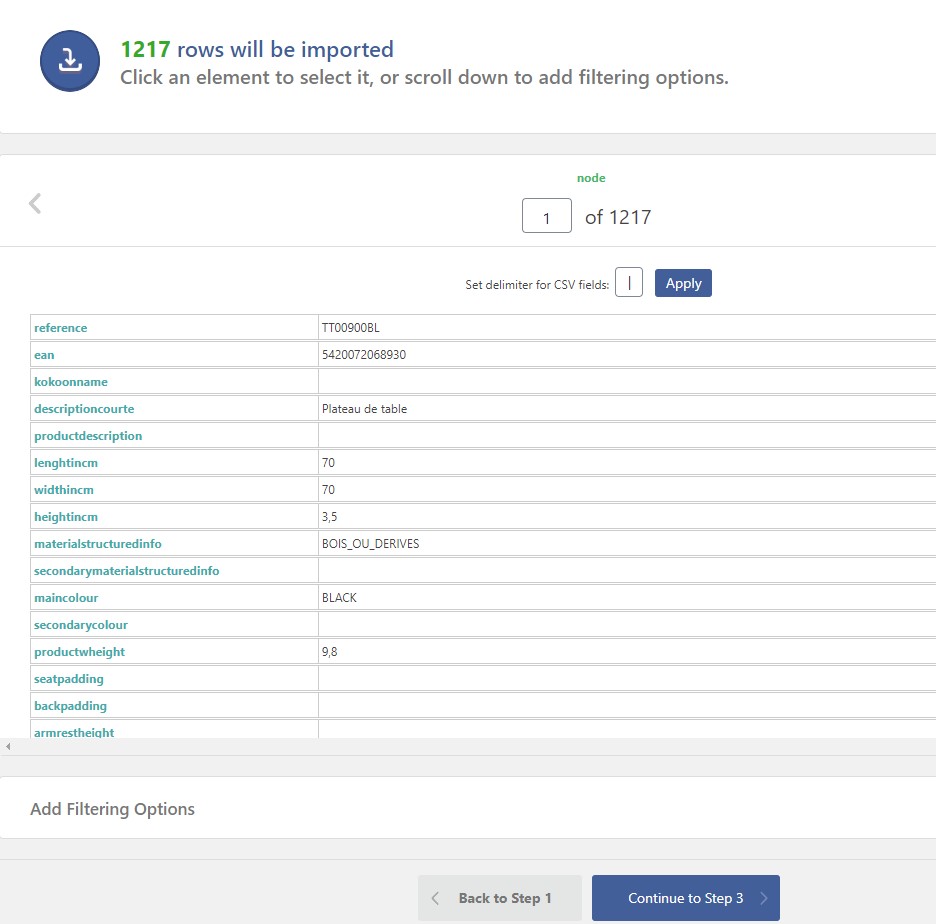
Then click on “Apply”.
Wp All Import will then recognize the delimiter and format the CSV correctly.
You can click on the “Continue to step 3” button.
We’re now in the window where you’ll need to map the file fields with your store fields.
You’ll need to drag and drop fields from right to left as shown in the animated capture below:
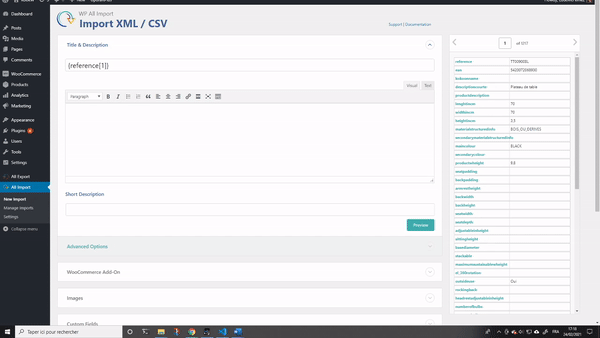
It’s up to you to map the fields you’re interested in.
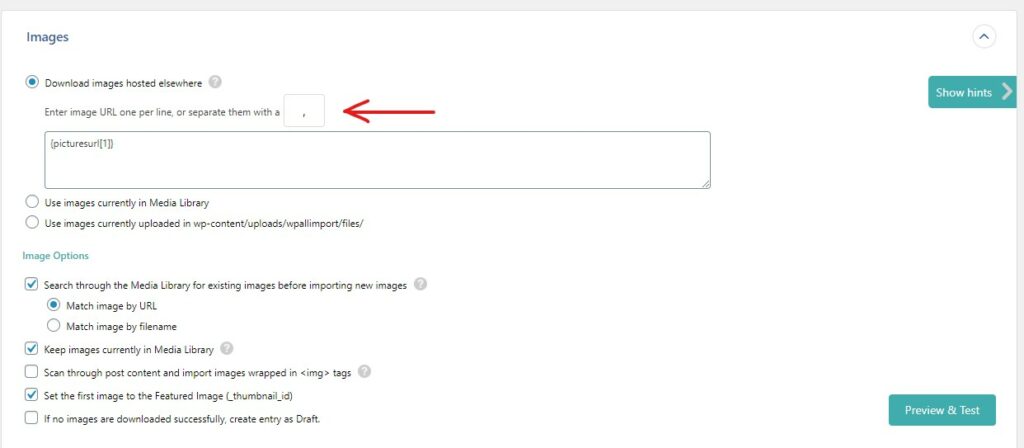
The only thing to remember is that for image mapping, the following delimiter must be specified: “ , ”.
When your mapping is complete, you can save it as a template to use later on, and click on the “Continue to step 4” button.
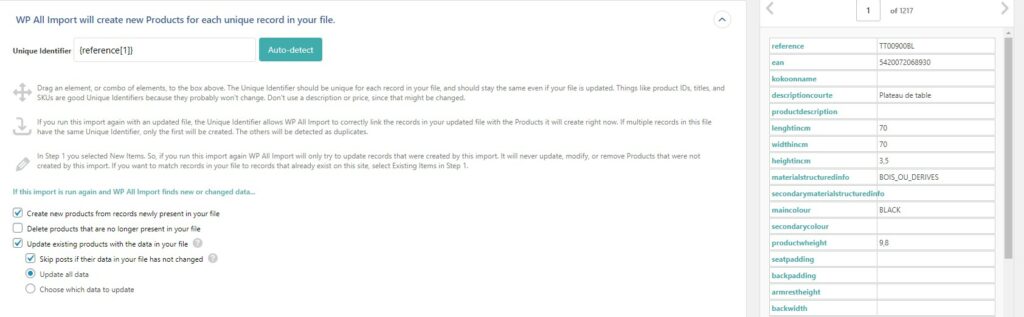
In this second to last window, you’ll need to drag and drop the “reference” field into the “Unique Identifier” field as below
Then click “Continue” to see the last step.
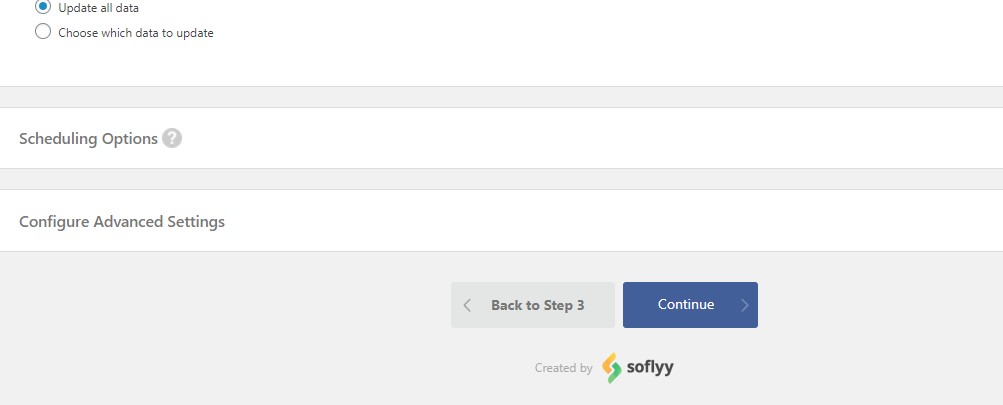
And finally click on one of the two “Confirm & Run Import” buttons.

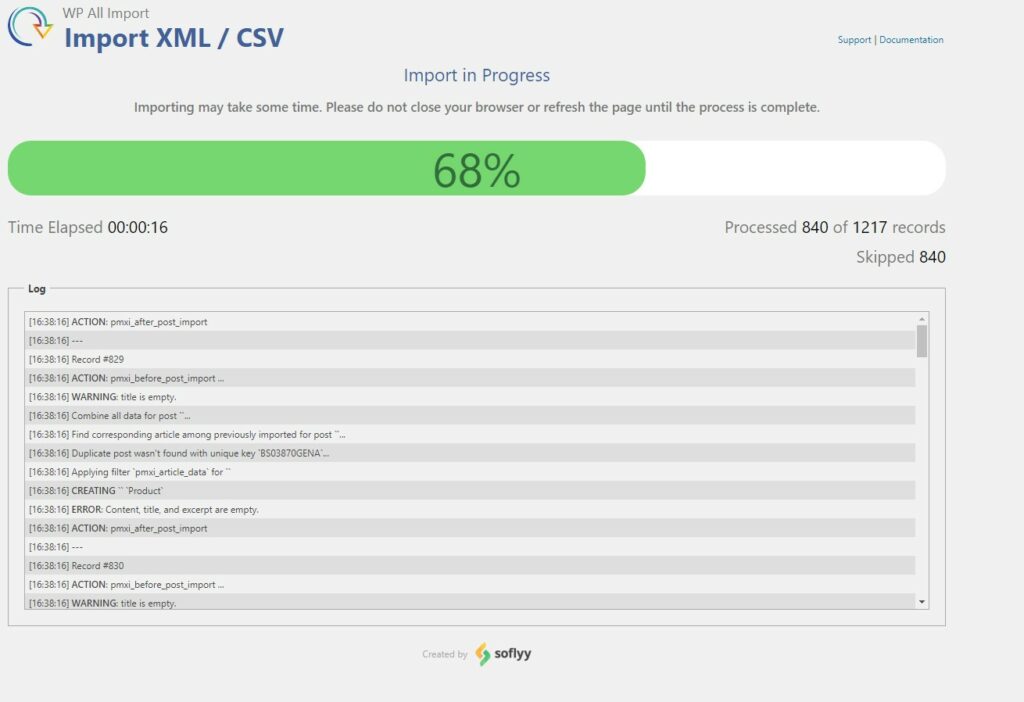
You’ll then see the import happening before your eyes as shown below.
The only difference with the capture below is that the note will say “Created” instead of “Skipped”.
And at the end:
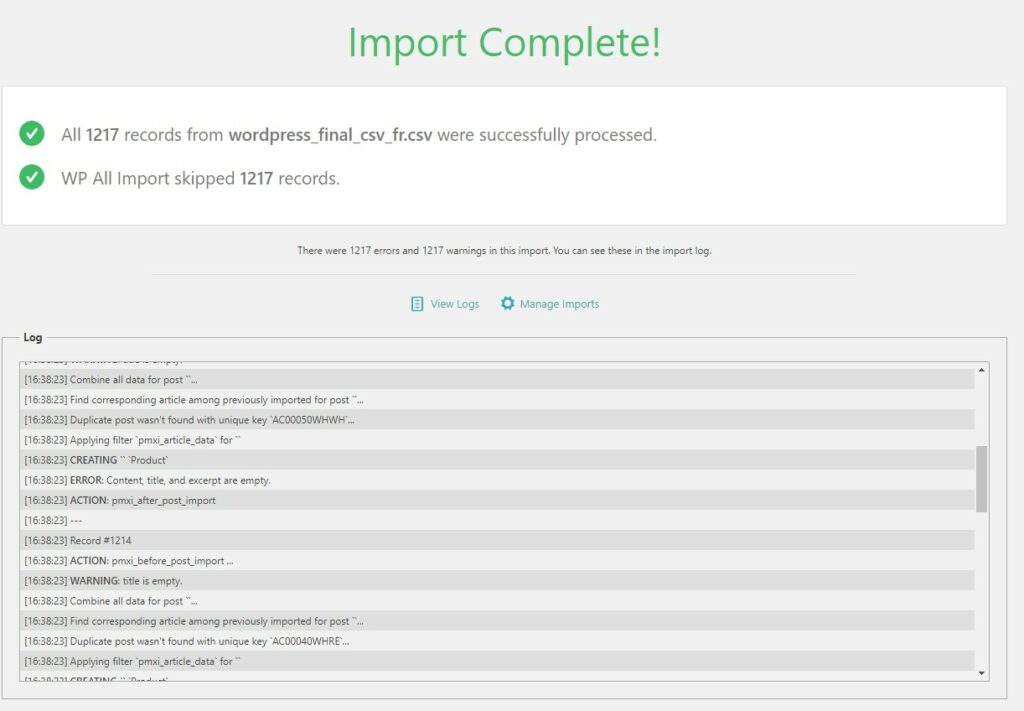
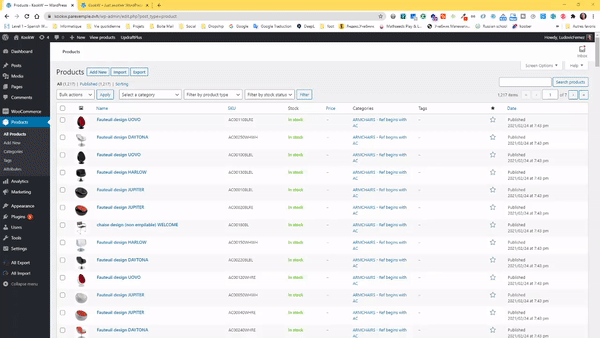
You will then be able to enjoy the completed import in your store, both on the backend and frontend side.
MANAGING ERRORS
While importing, the process may stop due to a timeout while downloading pictures.

To remedy this, you have two solutions:
You can increase the value of your “max_execution_time” variable in the php.ini file or in the parameters of your panel.
For these tests, we’ve set the value at 10000.
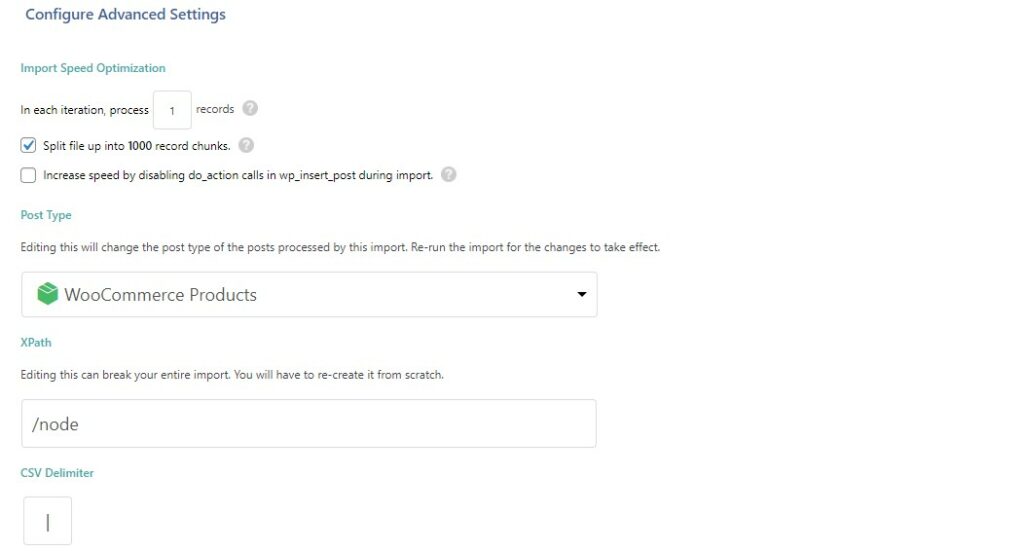
You also have the option of changing the number of iterations in the Wp All Import settings. It’s set to 20 by default, which means that if you have 10 pictures per product and the process tries to retrieve them in bundles of 20, this means that it’s trying to download 200 pictures per iteration, which can quickly overwhelm the timeout if its value is too low.
We recommend setting this value to 1 so the process will run smoothly.